
Top Mistakes People Make When Wearing Braces

Top Mistakes People Make When Wearing Braces
A well-fitted brace can reduce knee pain, steady a sprained ankle, or protect a healing wrist. But even the best brace won't help if you wear it wrong. Most bracing mistakes come down to fit, positioning, and timing. The good news is they are easy to fix. Here's how to choose the right brace, put it on correctly, keep your skin happy, and actually support your rehab instead of stalling it.
Fit and Selection: Start with the Right Brace
Choosing the Wrong Type for the Injury
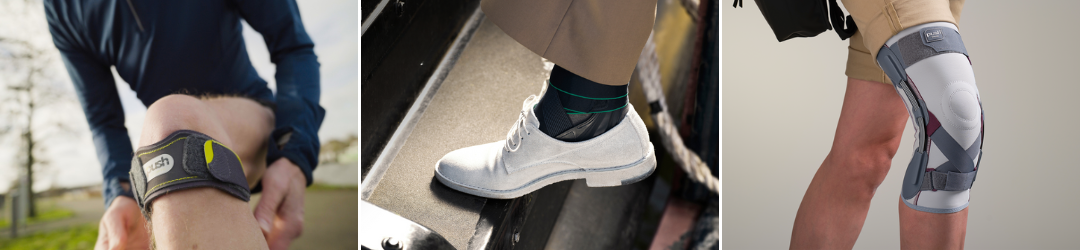
Braces aren't one-size-fits-all for conditions. A patellar-tracking knee brace helps if your kneecap is drifting, but it won't stabilize a grade II MCL sprain the way a hinged brace can. An elastic sleeve might soothe a mild ankle sprain, yet a lace-up or figure-8 brace controls inversion/eversion far better for sports. For wrist pain, a neutral-wrist splint supports carpal tunnel, while a good thumb brace can ease your thumb cmc osteoarthritis and help you regain your hand function again.
How to fix it:
- Match brace to goal: limit motion (post-injury), guide motion (patella tracking), or compress/swaddle (mild swelling/support).
- When in doubt, check the product's "indications" and confirm with a clinician, especially after acute injuries or surgery.
Guessing Size Instead Of Measuring
Sizing labels vary by brand. A "medium" in one brace can fit like a "small" elsewhere. Guessing leads to braces that slip, pinch, or don't do much at all.
How to fix it:
- Measure exactly where the brand specifies (e.g., 6" above knee center: wrist circumference at the crease: ankle at malleoli). Use a soft tape.
- If you're between sizes, most stabilizing braces work better slightly snug than loose, unless you have swelling that fluctuates.
- Recheck measurements if your weight changes or swelling subsides.
Ignoring Left/Right or Hinged/Non-Hinged Differences
Some braces are symmetrical. Many aren't. Left/right knee or ankle braces are shaped to your anatomy: wearing the wrong side twists supports out of position. Hinged vs. non-hinged matters too. Hinges control side-to-side forces. Sleeves do not.
How to fix it:
- Verify L/R markings and hinge orientation before donning.
- Reserve hinged braces for ligament stabilization. Choose sleeves or straps for compression and proprioception when stability is not the main issue.
Donning and Positioning: How You Put It On Matters
Follow The Manufacturer Instructions First
Some braces only work as designed when you follow the brand’s fitting steps. Before you judge comfort or support, read the instructions that come with your brace. Small setup details can change how effective the brace feels.
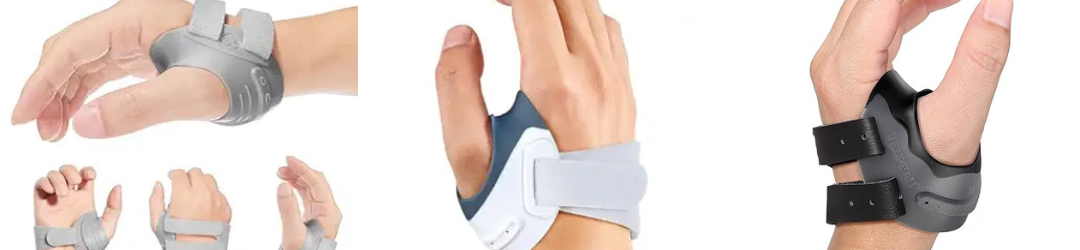
Example. Push MetaGrip for thumb CMC pain and thumb CMC osteoarthritis
- Place the brace at the base of the thumb so it targets the thumb CMC joint.
- Squeeze the brace when you first put it on to seat it properly. If you skip this step, it can feel loose and support drops.
- After a few minutes of use, recheck the fit. It should feel secure at the CMC joint without numbness or tingling.

Common Positioning Mistakes That Reduce Support
A brace that sits too far forward, too far back, or slightly rotated can rub your skin and reduce support. Openings and stays only work when they line up with the joint they are meant to guide.
How to fix it
- Knees: Align hinges with the knee’s natural bend point. If there is a patella opening, center it over the kneecap so it can guide tracking.
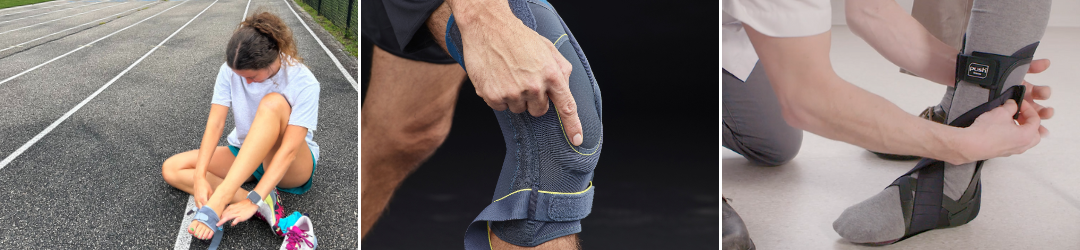
- Ankles: Center side supports along the ankle bones. They should limit rolling without pinching.
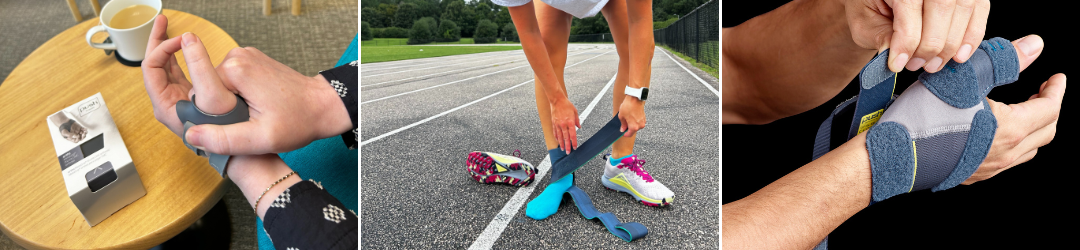
- Wrists: Keep the wrist neutral, not bent up or down. Center the palm stay along the middle of the palm and forearm so it supports the wrist, not the fingers.
- Thumb braces: Match the brace to the joint. For thumb CMC osteoarthritis, the brace should sit at the base of the thumb and stabilize the CMC joint. For skier’s thumb, support should focus on the thumb MCP joint. If the brace rides up into the web space, reposition and tighten.
- Quick check: Move for 2 to 3 minutes, then recheck alignment. If it shifts, adjust straps or sizing.
Layering Over Bulky Clothing
A brace over joggers or a thick sock moves. Fabric shifts, straps loosen, and your support disappears mid-walk.
How to fix it:
- Wear against skin or over a thin, moisture-wicking liner sleeve. Avoid seams under pressure points.
- If hygiene or work rules require a layer, go thin and smooth, then retighten once you stand.
Skipping a Proper Break-In and Strap Sequence
Throwing it on and yanking straps randomly creates hot spots and uneven support.
How to fix it:
- Follow the manufacturer's strap order (it matters). Generally: anchor the middle, then alternate top/bottom to balance tension.
- Break-in rule: start with 30–60 minutes of light activity, check skin, adjust. Add time daily as tolerated.
- Re-seat the brace after 10–15 steps: many braces "settle" and need a quick retighten.
Tension and Comfort: Tight Enough, Not Too Tight
Over-Tightening and Cutting Off Circulation
More isn't better. Straps cranked to the max can compress nerves or restrict blood flow. Warning signs include tingling, numbness, throbbing, pale/blue toes or fingers, shiny skin indentations that linger.
How to fix it:
- The two-finger rule: you should slide two fingers under a strap with mild resistance.
- Do a quick circulation check: press a toenail/fingernail until it blanches: color should return within ~2 seconds. If not, loosen.
- Pain or pins-and-needles after 5–10 minutes? Loosen and reposition.
Wearing It So Loose It Slips
If the brace migrates, bunches, or rotates, it's too loose. A slipping brace can create friction burns and offers little stability.
How to fix it:
- Tighten evenly from the joint center outward. If one strap does all the work, adjust the others first.
- Consider a silicone-grip liner or a size down (if measurements fit) for sleeves that creep.
Not Rechecking Fit as You Move or Swell
Your limb isn't static. Swelling changes through the day: sweat reduces friction: muscles pump.
How to fix it:
- Recheck tension after 10 minutes of activity, then hourly during longer bouts.
- On high-swell days (post-activity or travel), start slightly looser and retighten as swelling falls.
- If swelling persists or worsens, talk to a clinician, fit might need re-evaluation.
Timing and Activity: When to Wear, When to Rest
Wearing It All Day Or Overnight Without Guidance
Round-the-clock wear can stiffen joints and irritate skin. Sleeping in a brace that isn't designed for night use can create pressure points.
How to fix it:
- Use the brace during activities that provoke pain or instability unless your provider says otherwise.
- Remove it for rest, gentle mobility work, and skin checks. Night wear only if prescribed (some post-op devices are exceptions).
Using The Wrong Brace for Sport or Workloads
A basic sleeve on a cutting sport (basketball, soccer) won't protect like a hinged knee brace. A flimsy wrist wrap won't help with repeated heavy lifts. A thumb spica won’t support your arthritic or unstable thumb CMC joint.
How to fix it:
- Match brace support to force demands: higher-impact or lateral-movement sports = more structure and straps.
- Test drive your brace in warm-up before full-speed play. If it aches, pinches, or rotates, adjust or upgrade support.
- For daily work or home tasks, choose a brace that supports the joint without limiting necessary motion. For example, a low profile thumb CMC brace for typing or gripping, or a flexible knee sleeve for long periods of standing.
Skin, Hygiene, and Care: Prevent Irritation and Odor
Ignoring Hot Spots, Redness, Or Numbness
Rub marks and numb patches are early warning signs. Ignore them and you can end up with blisters or nerve irritation.
How to fix it:
- Do a 5-minute and 30-minute skin check when you're new to a brace. Mild pink that fades quickly is okay: persistent redness, blisters, or numbness means adjust or stop.
- Use low-profile padding (gel dots, moleskin) over bony prominences if needed.
Not Cleaning or Replacing Liners and Straps
Sweat builds bacteria and breaks down materials, which leads to odor and weaker support.
How to fix it:
- Wash fabric parts per instructions
- Rotate or replace liners every few months if used daily.
- Extend the lifespan of your straps and hook-and-loop closures with regular cleaning/washing to remove dirt, grime, etc.
Wearing Over Lotions or Wet Skin
Lotions, sunscreen, and wet skin reduce friction and degrade adhesives, causing slippage.
How to fix it:
- Apply lotions at night or well before bracing. Pat skin dry before donning.
- If you sweat heavily, use a moisture-wicking sleeve or brief towel breaks to dry and retighten.

Rehab and Follow-Up: The Brace Is Only One Tool
Skipping Strength, Mobility, and Gait Training
A brace won't rebuild the engine. If you don't strengthen and retrain movement, you'll plateau.
How to fix it:
- Prioritize: joint-friendly strength (e.g., terminal knee extensions for knees, calf raises and balance for ankles, wrist/finger extensor work for wrists), mobility (gentle range, patellar glides if prescribed), and gait/technique.
- Progress weekly: more load, more control, better speed, without pain spikes that linger >24 hours.
Not Reviewing Fit with a Clinician Or Orthotist
Tiny tweaks, strap angle, hinge height, pad placement, change everything. DIY guesswork only goes so far.
How to fix it:
- Book a fit check after the first week of wear or anytime you notice slipping, new pain, or skin issues.
- Ask for activity-specific adjustments (running vs. desk work vs. lifting).
Using A Worn-Out or Counterfeit Device
Stretched elastic and wobbly hinges don't protect. Counterfeits may look the part but lack tested materials.
How to fix it:
- Inspect monthly: elasticity, stitching, hook-and-loop grip, hinge play. If support feels "mushy," replace.
- Buy from reputable retailers or directly from the manufacturer. Look for serial numbers and documented sizing charts.
Conclusion
The biggest mistakes people make when wearing joint braces are surprisingly simple: wrong brace, sloppy positioning, and ignoring what your skin and circulation are telling you. Get the right model for your injury, measure instead of guessing, line it up precisely, and set tension so it's secure but not strangling. Wear it when it helps you move and take it off to train the joint and let the skin breathe. If something feels off, it probably is. A quick re-fit or a check-in with a clinician can turn an annoying brace into a quiet, effective ally while you heal and rebuild.
Want a brace that feels right and actually helps? Visit BraceLab to browse braces by pain location, or contact us and we will match you to the right model, size, and support level, plus walk you through fit and setup so you can move with confidence.
Key Takeaways
- Choose the right joint brace type and size by matching your injury goal (limit, guide, or compress) to the product’s indications and measuring exactly as the brand specifies.
- Position matters: center hinges and patella openings, align stays correctly, follow the manufacturer’s strap order, and break in with short sessions before increasing wear time.
- Set tension snug but safe using the two-finger and nail blanch tests, then recheck and retighten after a few minutes of activity or as swelling changes.
- Wear the brace during pain- or instability-provoking activities—not all day—and match support level to your sport or workload after testing it in warm-ups.
- Protect skin and hygiene by using thin liners, avoiding lotions or wet skin, cleaning parts regularly, and fixing hot spots or numbness immediately.
- Joint braces support recovery but don’t replace rehab: progress strength, mobility, and gait, schedule a professional fit check, and replace worn or counterfeit gear.
Frequently Asked Questions
What are the biggest mistakes people make when wearing a joint brace?Common errors include picking the wrong brace for the injury, guessing size, misaligning hinges or patella openings, cranking straps too tight or wearing them too loose, layering over bulky clothing, and overusing the brace. Measure accurately, center the brace, use the two‑finger rule, and wear it mainly during provoking activities.
How tight should a knee, ankle, or wrist brace be?Aim for snug, not numb. Use the two‑finger rule—you should slide two fingers under each strap with mild resistance. Do a quick circulation test: press a nail until it blanches; color should return within about two seconds. Tingling, throbbing, or persistent redness means loosen, reposition, and recheck.
How do I choose the right joint brace for my injury?Match the brace to your goal: limit motion (post‑injury), guide motion (e.g., patellar tracking), or provide compression. Examples: hinged knee brace for MCL sprains, patellar‑tracking brace for kneecap issues, lace‑up/figure‑8 for ankle inversion, neutral‑wrist splint for carpal tunnel, thumb spica for De Quervain’s. Verify product indications and confirm with a clinician.
Can I wear my joint brace all day or sleep in it?Generally, wear the brace during activities that provoke pain or instability and remove it for rest, gentle mobility, and skin checks. Night use should be clinician‑directed or limited to braces designed for sleep or post‑op protocols. Continuous, unsupervised wear can irritate skin and promote stiffness.
How long should I wear a joint brace after an injury?Duration depends on injury severity and healing phase. Mild sprains might need a brace for days to a few weeks; ligament injuries or post‑op cases can require weeks to months with planned weaning. Progressively reduce wear as strength, control, and confidence improve, following your clinician’s guidance and rehab plan.
Helpful Links:
Simple Exercises to Reinforce Hand and Wrist Strength and Stability
The Role of Recovery: How Proper Rest and Support Lead to Long-Term Success
Push MetaGrip Thumb CMC orthosis
Push MetaGrip educational video
Disclaimer: While we strive to provide helpful and accurate information, BraceLab is not a medical provider and does not offer medical diagnoses or treatment. Always consult a qualified healthcare professional for medical advice, diagnosis, or treatment.
© BraceLab; 2026 all rights reserved